State Groups
State Groups are used to manage the States of the application.
How it works
A State Machine is a bit like a vending machine. You start with the main screen, waiting for you to pick something. That's the initial state. When you select the item you want, it moves to a different state, like showing the price or asking for payment. After you pay, it moves to another state, dispensing your snack and returning to the main screen.
Therefore, a State Machine is basically like a vending machine. It has different states it can be in, and it moves between them based on what you do. Each state has a specific job or action, and the machine changes states to perform those actions.
Here’s an example of how these states are utilized to enable the FORXAI Mirror workflow:

Create a State group
To ensure proper switching between States, a State group must be created, where the default (first) State is defined. Each state represents a single Flow.
To create a state group, follow these steps:
Click Create state group.
Enter the name.
Set the default state.
The default state is the origin state of the entire State group.
Assign flows to a State group
Once a State group is created and the default state is set, all other states (flows) must be assigned to the state group. To assign the flows, follow these steps:
Go to a flow you want to add to your State group.
Click the Edit flow button marked by a pencil.
Open the State group dropdown.
Select the appropriate State group.
Click Save.
Switching between states
To switch from one state to another, follow these steps:
Add the Change Flow node to the flow (state) from which you want to switch.
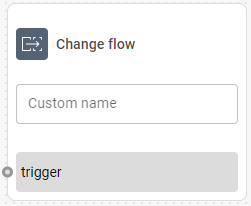
Connect the output of the node that fulfills the condition for switching to another state to the trigger input of the Change flow node.

Open the settings of the Change flow node and select the state you want to switch to.