Licenses
The Licenses section describes how to validate the Video Vision software license.
Prerequisites
You can validate the license after you complete the following prerequisites:
Order the product and the license.
Obtain the product key.
Note: The LMS server sends an email notification that contains the product key when you order the product and license, as illustrated in the following example:
Sun 13/06/2024 15:35 From: lms-system-notification@konicaminolta.com E-License for Dear DMY_20240602, An e-licence has been created from the following order, the details are below: Order Overview Follow the steps given below to activate and manage your entitlement(s):
http://konicaminoltainc.dev.sentinelcloud.com:80/ems/customerLogin.html?siteLanguage=en
© Konica Minolta, Inc. All Rights Reserved |
License activation
License activation is a one-time, manual procedure.
Follow these steps:
Open the email you received when you ordered the product and click the activation link.
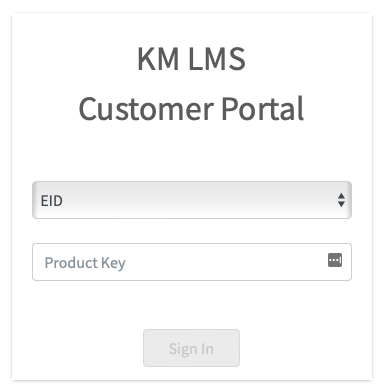
Click the drop-down and select EID.
Enter the product key specified in the email and click Sign In.
Verify the correct products are checked, then click Activate:
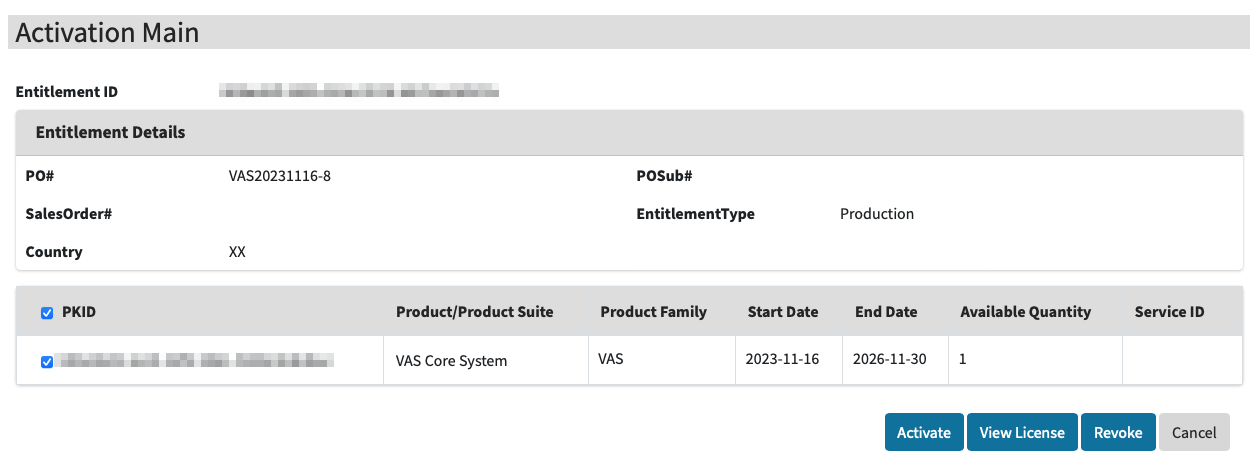
The license is limited to a single use. Once activated, it cannot be reused for other devices.
The Activate Products page appears.
Open a separate browser tab and access the Video Vision platform.
Click the FORXAI Video Vision tile.
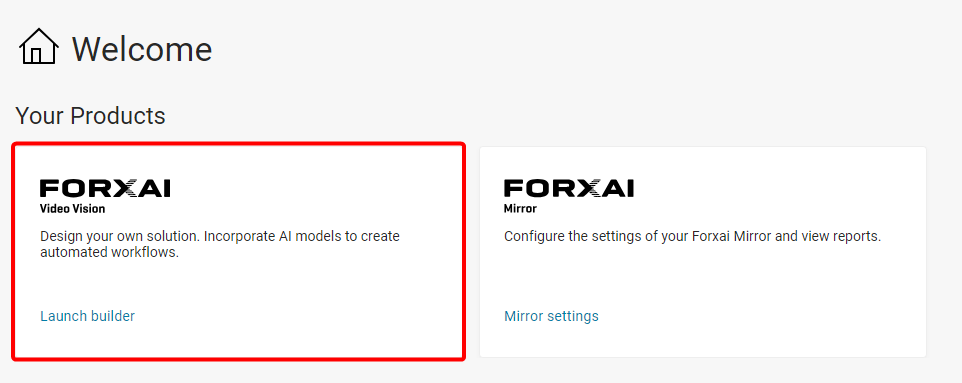
Click the View button to open the appropriate project.
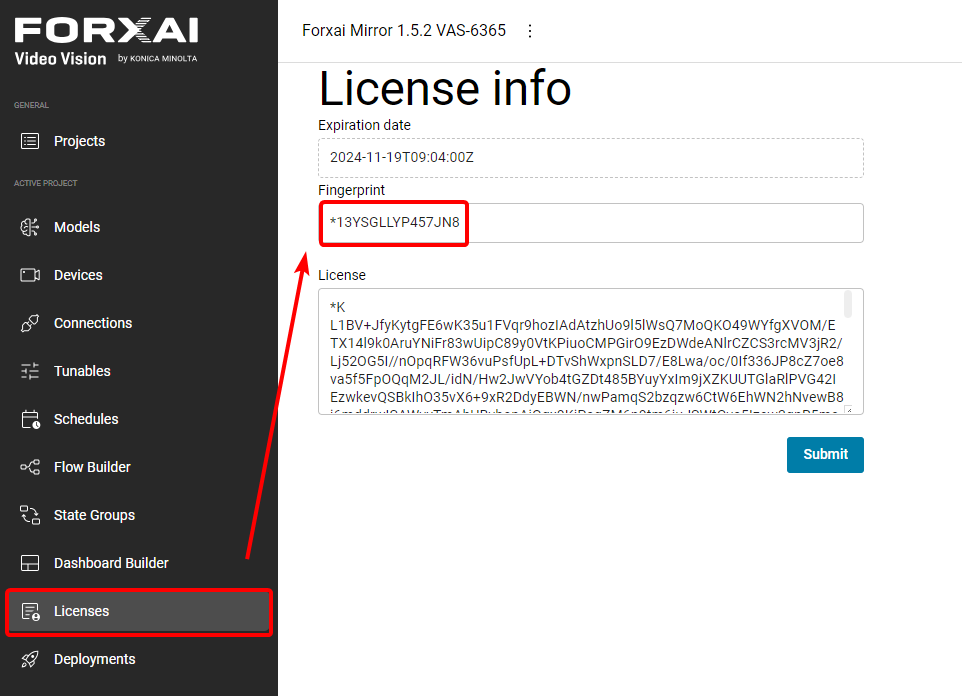
Copy the Fingerprint value you received during the Installation process.
If you didn’t record the Fingerprint value during the installation, follow these steps:
Connect to the server via Terminal:
CODEssh vasadmin@x.x.x.x
Enter the password
vasadminSwitch to root privileges:
CODEsudo -ithen enter the password again.
Enter the following command:
CODE./termix --fingerprintCopy the machine fingerprint.
Go to the Licenses tab, and paste the Fingerprint value into the Fingerprint field.
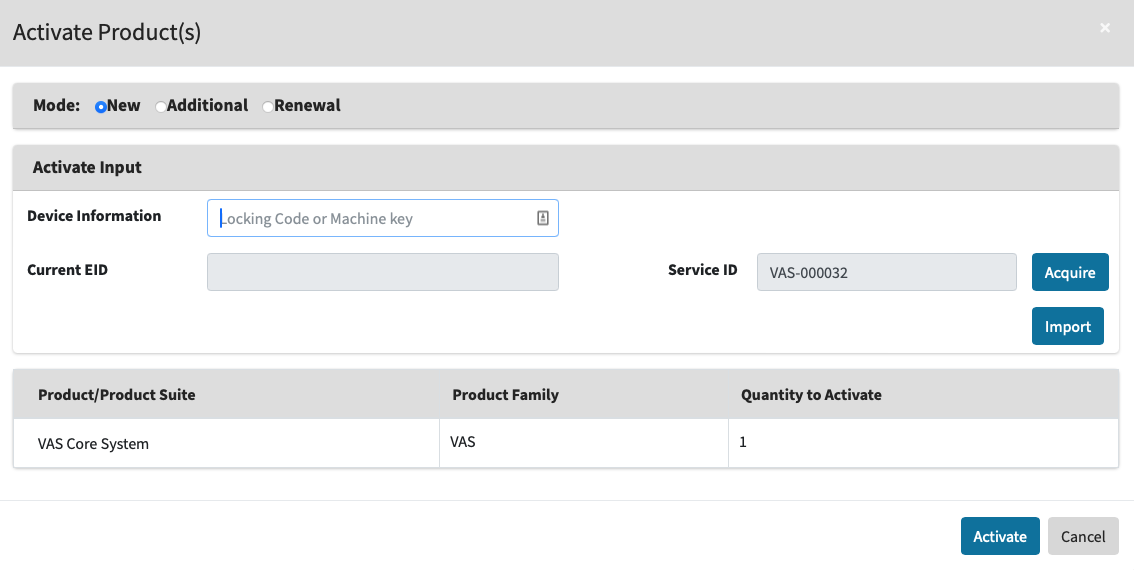
Return to the LMS activation system, then paste the Fingerprint value into the Device information field.
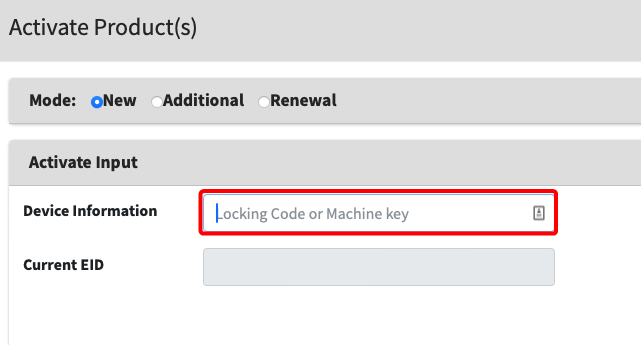
Click the Acquire button to assign the machine Service ID if you are creating a new license.
The Service ID is unique to every device and service running a FORXAI license.
Click Activate.

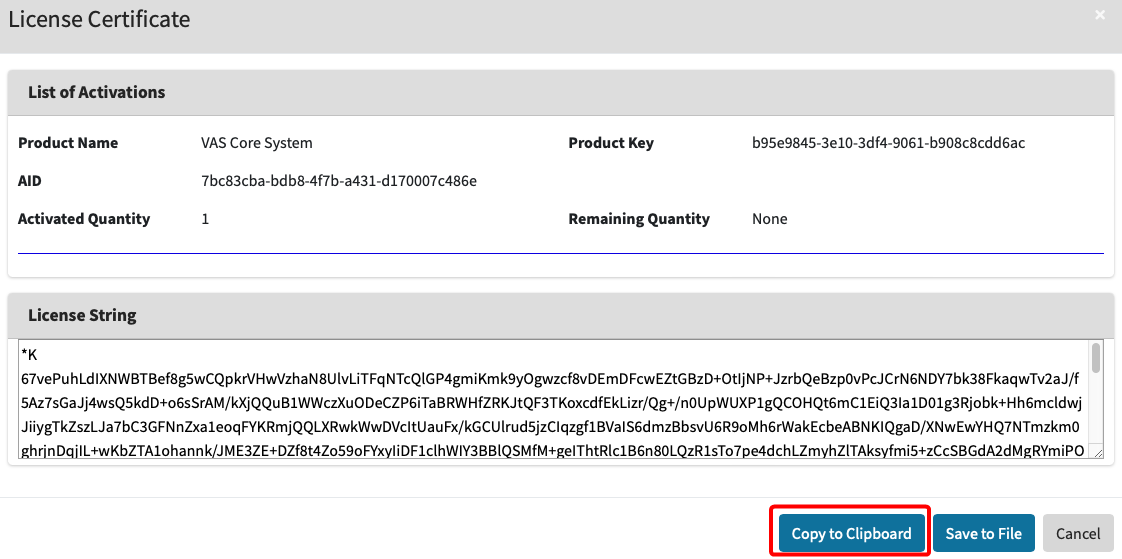
Click View License.
Click Copy to Clipboard to copy the License string.
Return to the FORXAI platform tab and paste the License string into the License field.
Click the Submit button.
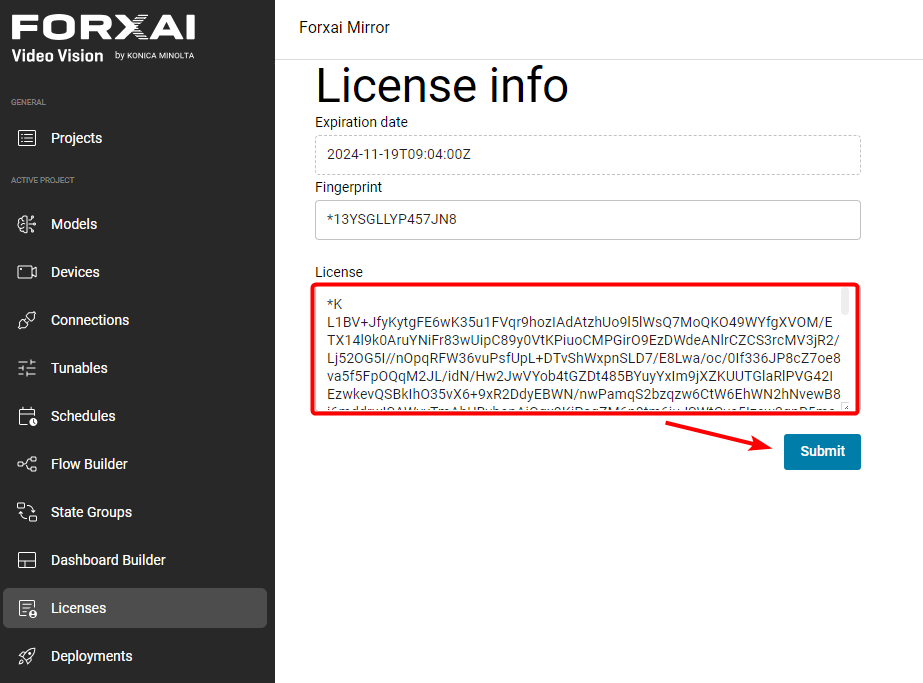
You have successfully activated the license.